05 Nov My Collage Creation Process
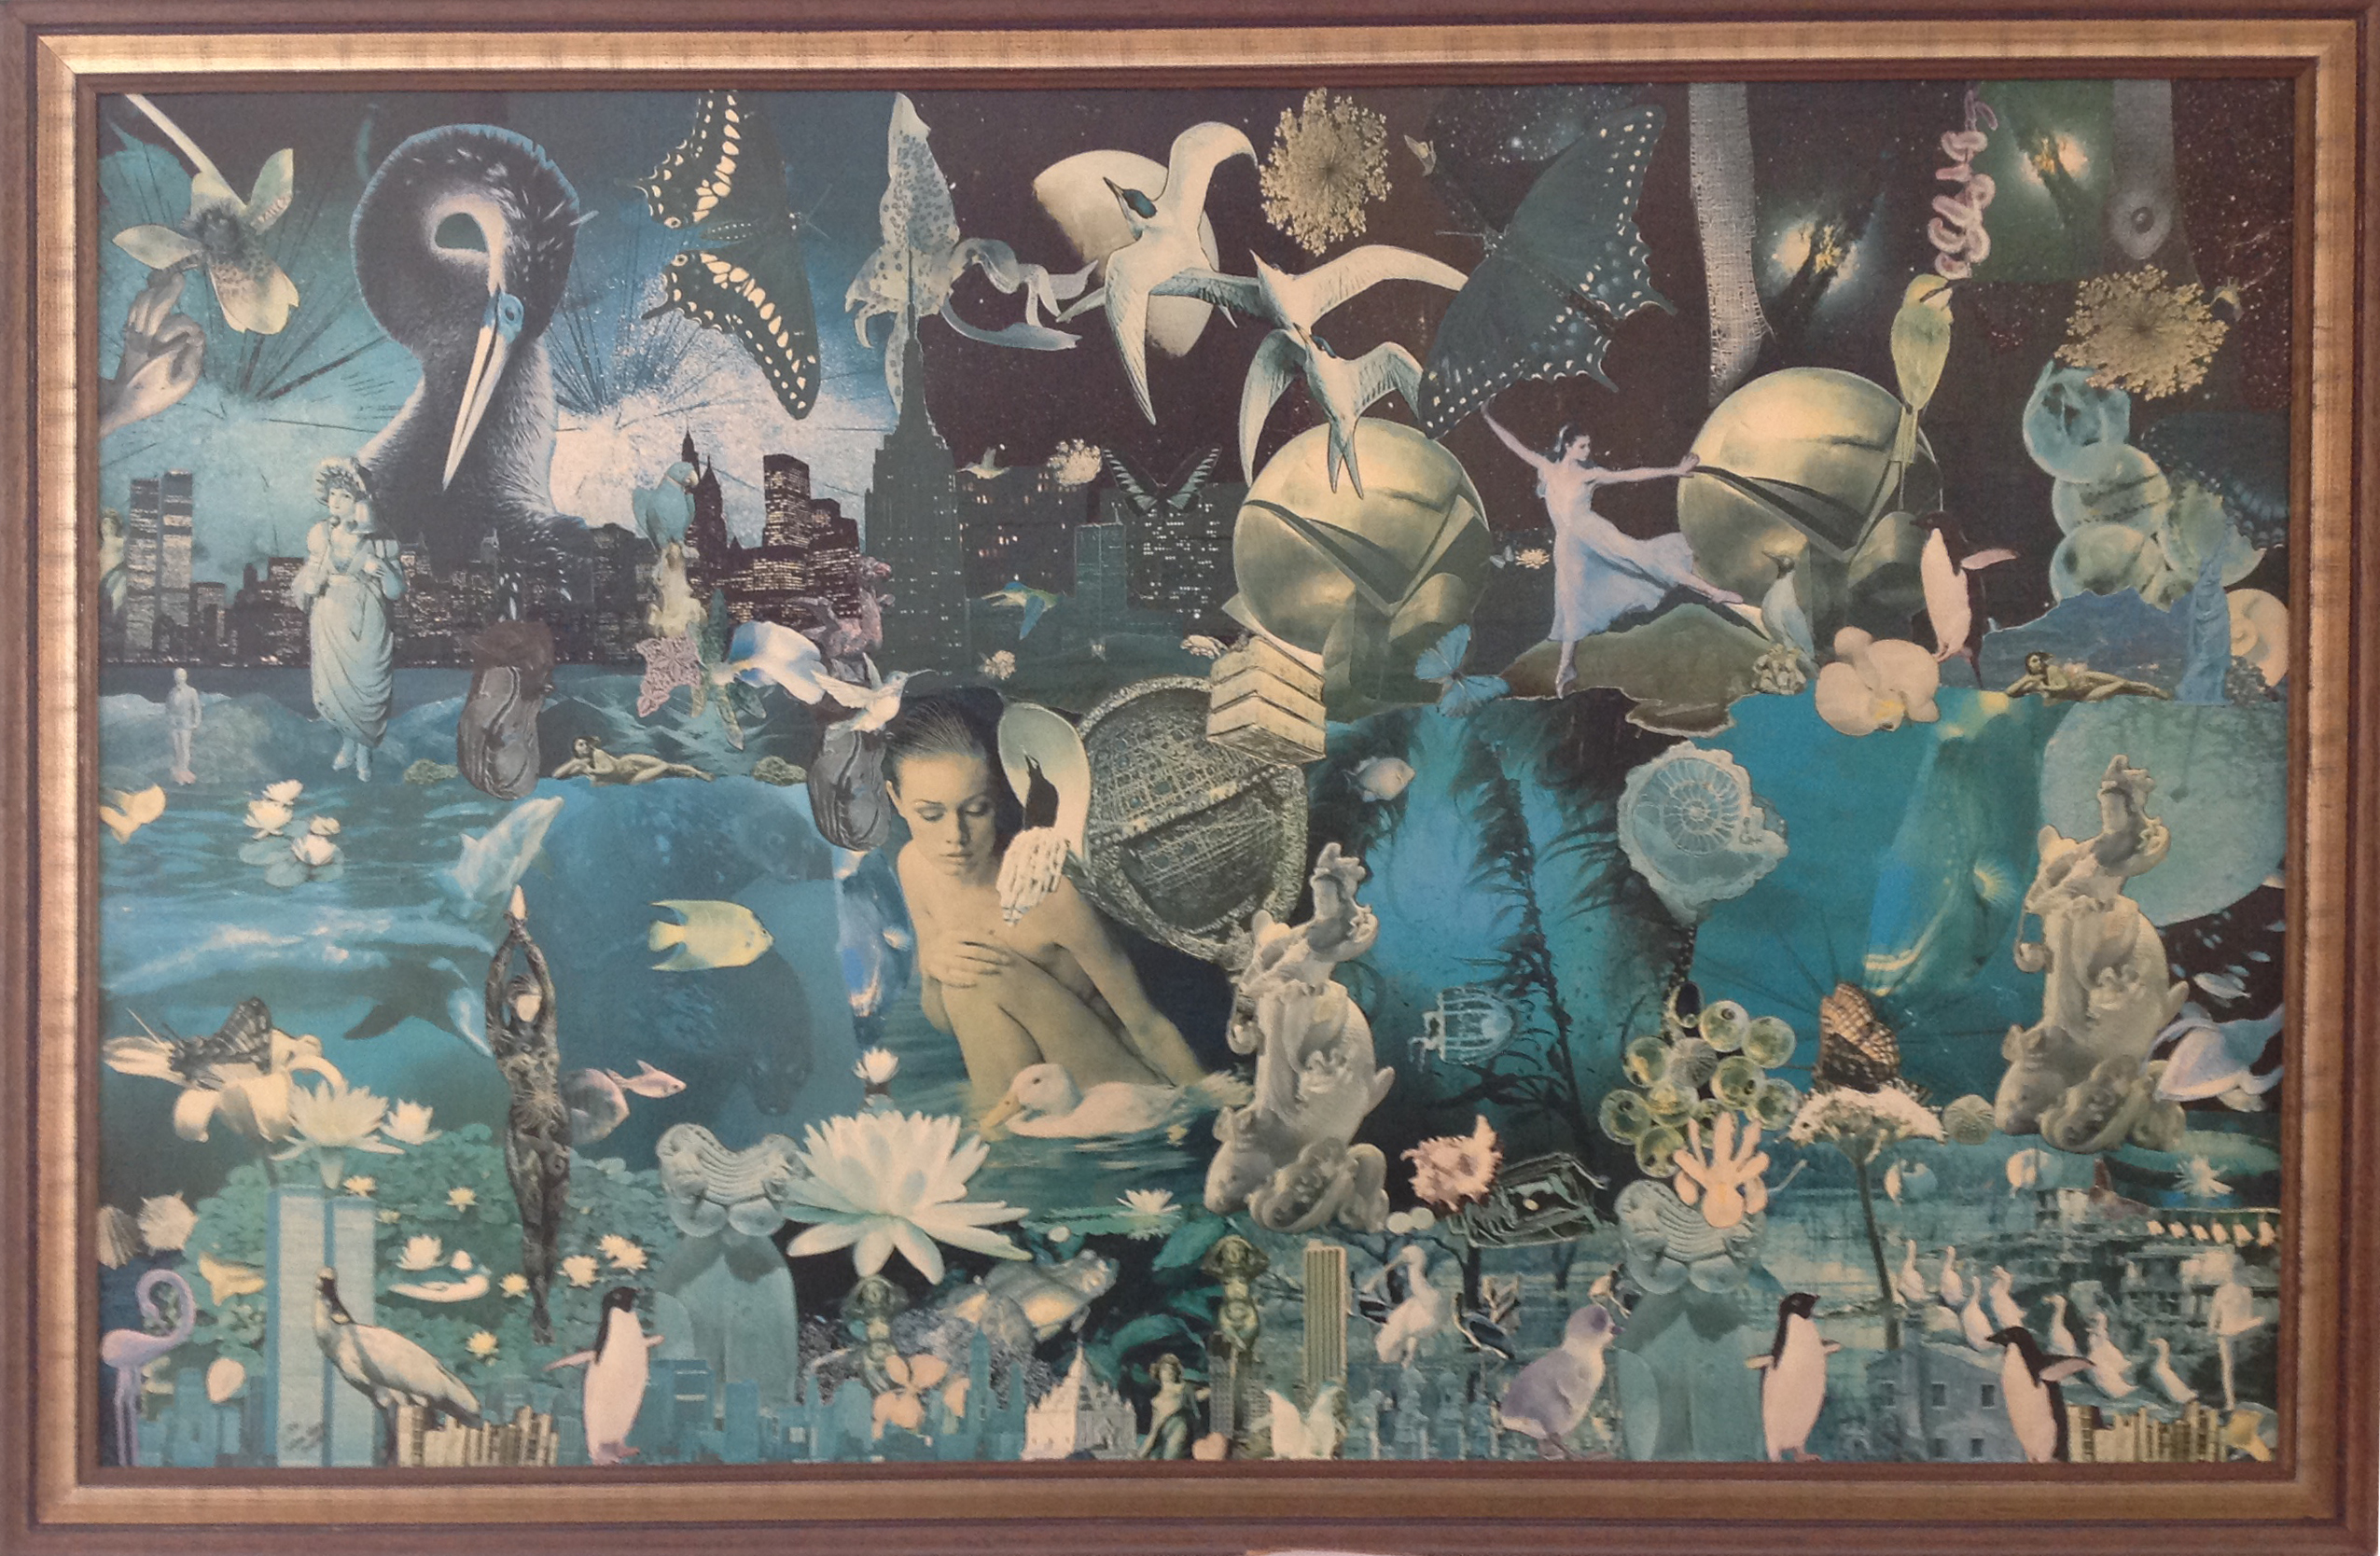
I wonder as you look at these collages if you imagine yourself making your own. People often ask me how I create my collages, and how long each takes to complete. I finished Mermaids, pictured here, in 1981. I used a 28 by 44 inch paperboard, the largest size I’ve attempted. The main challenge with this size collage is finding enough images of the appropriate colors.
When I started this piece I had recently moved back to New York City from New Rochelle, a New York suburb, to a sparsely furnished studio apartment on West 57thStreet, near the Art Students’ League and Lee’s art supply store (now long gone). That is probably where I purchased the Bambridge paperboard for this collage. A good supply of interesting magazines is my ongoing resource. The paper should be glossy and heavy enough for glue.
My style back then was to work with just a few colors. The predominant colors here are turquoise, black and white, with a few spots of yellow and gold. I usually begin by searching for large pages of matching color to cover the top portion of the canvas or board, for the background. Mermaidshas three horizontal sections – night sky, sea and foreground. I usually include a human figure. If there is text with the image, either I cover it or cut it out. Each bird, mermaid, flower, etc. is individually cut using scissors.
I do not plan what the collage will look like before I start except that I want it to look like a painting and I want it to show beauty. Once I have a background, it is a matter of going through many boxes of images and finding items that will work with that background. I do not pre-sort these pictures. Once I am satisfied with the composition, it is time to glue.
My glue is acrylic medium which dries quickly. The background pieces need to go down first and I need to remember fairly accurately where the next layer of images belongs. I now use a separate canvas board for gluing, so I can glue background images first and keep the composition fairly intact on the original board. I also take a few photos with my i-Pad before I start gluing. I lay the paper face down on waxed paper and apply the acrylic medium with a sponge brush, then carefully and quickly place the image face up and adhere it to the board. I wipe away excess glue and use a brayer to get the paper flat and free of air bubbles, a trick that I learned from a Romare Bearden (1912-1988) documentary. The process of gluing alone takes a few hours and I do that in one session.
I remove any remaining air bubbles and flatten any wrinkles by covering the collage with waxed paper, piling up some heavy books to cover each square inch and leaving it overnight. Then, over a period of a few days, I apply two or three finishing coats of acrylic medium which dries clear like varnish.
So, how long did it take to complete Mermaids? Someone once said that the answer to that type of question is not so many hours or days, but one’s entire life to that point. But I do remember that this one took at least six months, while working a full time library job and, of course, all the time prior to that point that I spent learning my craft, collecting the found images which go serendipitously into each one, and being inspired by the work of other artists. I hope I may have inspired you to try your hand at making your own collage art.


Sorry, the comment form is closed at this time.